Crochet Doll Tutorial 2.0
Crochet a Doll
with me
Online doll-making course
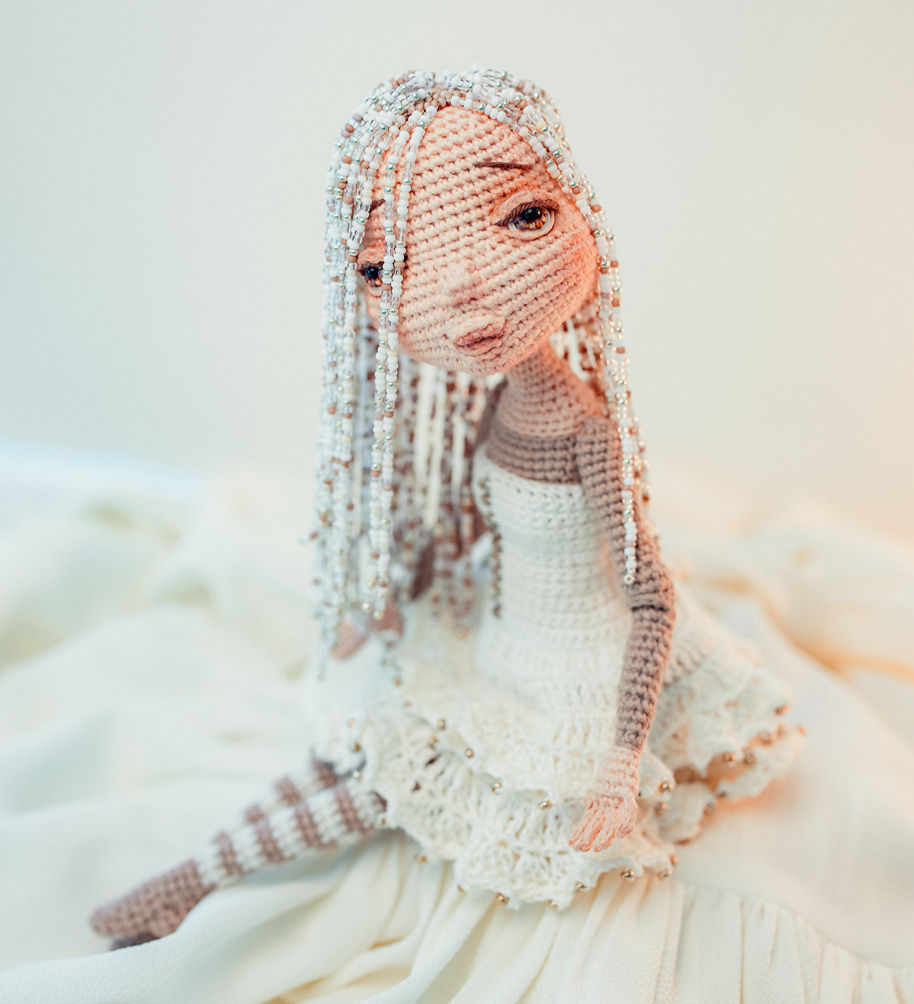
Create your own unique crochet doll with a sculpted face, movable joints, and elegant forms while learning my personal doll-making techniques step by step.
✦ 1 year of access on desktop and mobile
✦ Downloadable PDF patterns
✦ Photos and videos for the more complex steps
✦ My personal support along the way
$67 CAD
Inside the course
✦ Create a doll that can move and pose
✦ Add personality with a sculpted face, including lips, nose, eyelids, and ears crocheted directly into the head
✦ Give your character natural, playful movement with a ball-jointed head
✦ Choose between beaded and crocheted hair to create a look that's uniquely yours
✦ Bonus: A dress pattern to complete your doll's story
Enjoy a calm, self-paced experience on my website with downloadable PDF patterns, and photos and videos that will support you through the more complex steps.
More about this course
You’ll create a movable doll with separate parts, not just a static figure.
We'll crochet the head with lips, nose, eyelids and ears as you work.
I’ll share my personal tips and tricks for shaping, assembling, and finishing, things I’ve developed over years of doll-making.
Build your doll gradually, one part each week, so the process feels relaxed, creative, and enjoyable.

How It Works
✦ Follow a step-by-step process through more than 10 course sections to create your doll.
✦ Each section includes a PDF pattern with written instructions, photos, and video tutorials for a different part of the doll.
✦ As you complete each section, you'll build a fully movable doll from separate pieces, not just a static figure.
✦ You'll have one year of access to the course, so you can revisit any step at any time or download the PDF patterns and crochet at your own pace.

Program plan
1
Intro. Materials. Techniques

2
Legs

3
Thighs

4
Hands

5
Body

6
Head part 1

7
Head part 2

8
Assembling

9
Beaded hair

10
Crocheted hair

11
Bonus: Dress pattern

It’s not just a crochet pattern.
It’s your new art project!


Materials Needed
Cotton yarn (Hobbii Rainbow Deluxe recommended), 1.75 mm hook, scissors, tapestry needle, polyester stuffing, wooden sticks, Q-tips, soft chalk pastel or blush, toothpicks, and a small amount of white glue. No wires or additional joints are needed.
Get full list of materials to your email:
Course details
Finished Doll Size
about 31 cm
Skill level
Intermediate
Language
English (Us Terminology)
Access
1 year on my website, PDF files available for download
Each part includes written instructions, photos, and video demonstrations for the more complex steps.
Support
I’m always happy to help if you have questions along the way.
Is this tutorial for you?
Yes, if you...
✦ Love detailed craftsmanship
✦ Enjoy learning new techniques
✦ Want to create unique movable dolls
✦ Value creativity as much as instruction
Probably not, if you...
✦ Prefer quick, simple projects
✦ Are looking for a beginner pattern
✦ Want to crochet without paying attention
By using this tutorial, you agree to the following terms:
Non-Refundable
Due to the digital nature of this product, all sales are final.
No returns, cancellations, or refunds will be accepted once the purchase is completed.
Personal Use Only
This tutorial is for personal use only.
You may not share, distribute, or resell the pattern, instructions, videos, or any part of the content in any form.
Copyright Protected
All materials (text, photos, videos, and design) are the intellectual property of dolls.kateblc.com and are protected under copyright law. Copying, reproducing, or redistributing the content is strictly prohibited.
Finished Dolls – Personal Use and Small Quantity Sales
You may use this pattern to make dolls for personal use or as gifts.
Selling finished dolls in small quantities is allowed, but please credit me as the designer.
Mass production, factory manufacturing, or using this pattern in workshops or classes without permission is not allowed.
